Choosing Your Starter Image
 Starter image choice for this effect (like my last tutorial "Miniature Photos From Full Sized Ones") is important - so choose a scene with one object (be it a person, an animal or just an inanimate object) that will lend itself well to this perspective - side shots with a slanted perspective probably work best. (additional sample photos will be provided in next assignment)
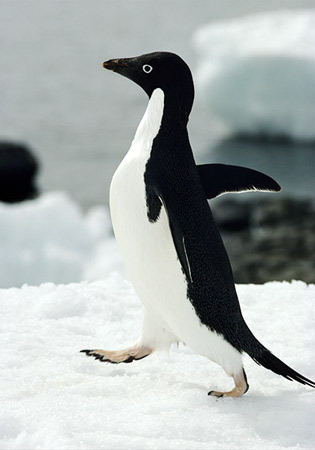
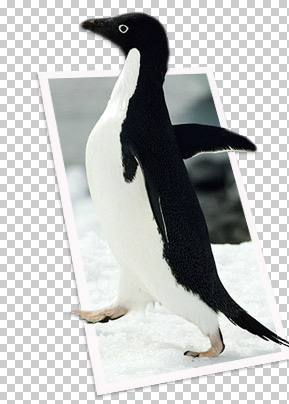
This little penguin guy is so full of energy and enthusiasm in this photo that I couldn't help but choose it. That, and he's stepping forward and has a wing out - two things that will work remarkably well with this effect. We're going to try to make him step off the page. Lets get started and bust you out of there!
Step 1
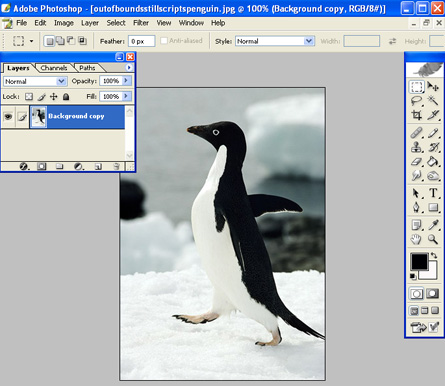
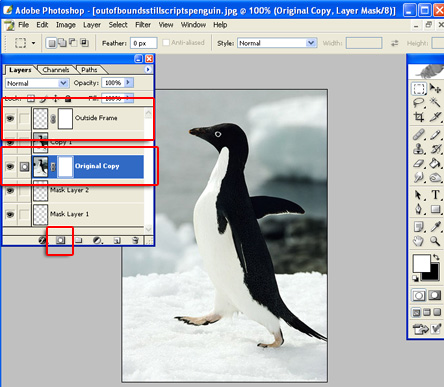
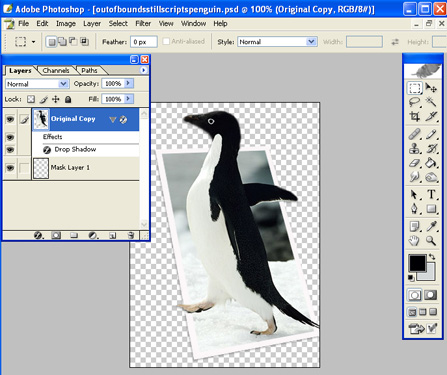
The first thing we're going to need to do is setup some layers. With your layer window open and ready - create four separate layers.
- Rename the first picture "Original" and keep it as a layer.
- Create a copy of our "Original" layer and name it "Copy" as shown.
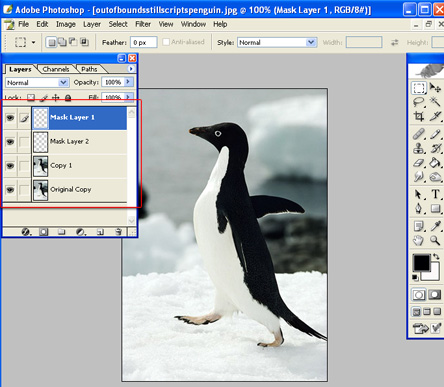
- We're going to need two layers for random uses. Name 1 "Mask 1" and the other "Mask 2" - or whatever you like.
Step 2
Alright, now that our layers are all setup and ready we're actually going to create one more additional layer.
- Create a fifth layer and name it "Frame".
- On both this fifth frame AND our "Original" layer, select the layer and click the button marked in red to give them both masks. Now when highlighted both layers "Frame" and "Original" should now have a mask symbol to the left of them.
Step 3
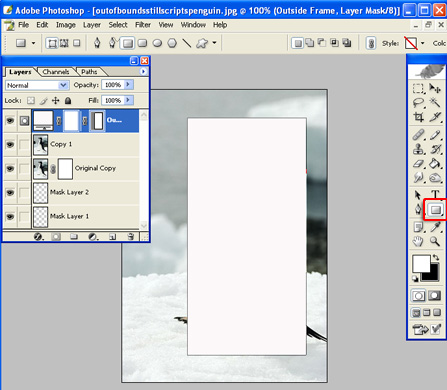
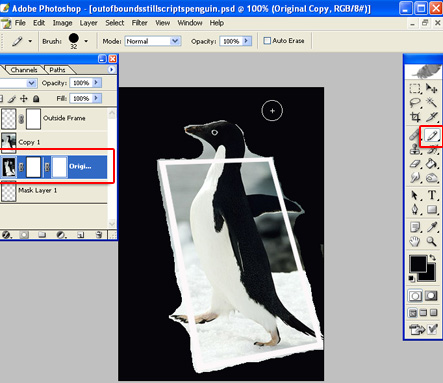
- Now with our "Frame" layer selected, we're going to select the shape tool from our tools and create our frame for the penguin to burst from. You'd want to frame it like you would a photo - but this time you want to leave the parts of him that we'll be bursting out of the picture just outside the frame. As you can see in the image above, I've already got his foot and tail outside the frame. We'll adjust it more to get his head and wing outside the frame in a few minutes.
Step 4

- After you get your white box placed well enough - go about a half inch in from each side of this box and user your selection tool to highlight the inside in a box shape. You can see more from the picture what I am talking about - as its hard to put into words without a visual aide. You'll then want to select to rasterize the layer as shown. If this deselects the box we just highlighted, go ahead and re-select it.
Step 5
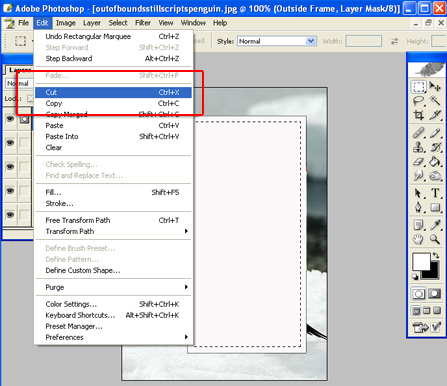
- Now with our box shape selected just inside the white shape we overlayed onto the picture - we choose to cut with the "Frame" layer selected as shown in the picture above. This will bring our penguin back to us while keeping a Polaroid picture-like frame around him. This is exactly what we want.
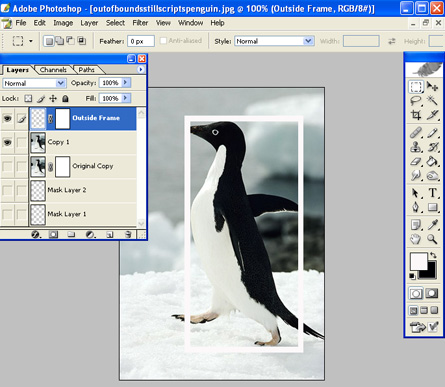
- After step 5 is complete, your photo should look something like this.
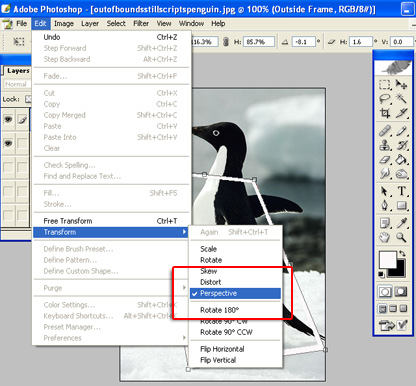
- We'll now select the "Perspective" tool as shown - and fiddle with the perspective until we get it to an angle that will cause it to look like this little guy is coming out of the photo. You'll want to angle it up and to the left the best you can while still keeping its rectangle shape. Don't fret if you cant get it perfect, as we still have one step to go for that.
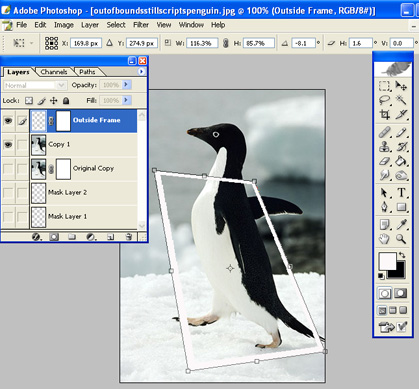
- Here is what we have after using the perspective tool
Step 7
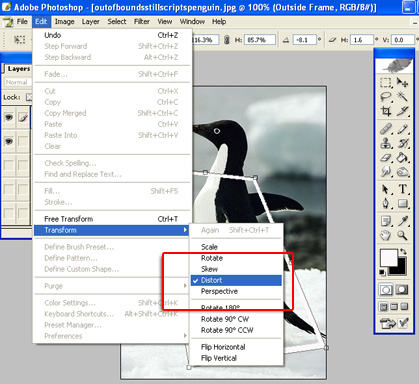
- Next we'll use the "Distorition" tool in the same way as the last step with the perspective tool. Use the distortion tool to further fix your angel for best results. i think by now you can see how this ofrced perspective is done.
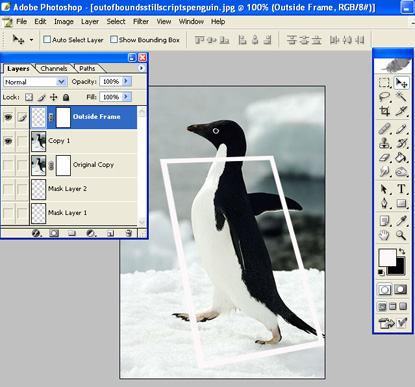
- After all that, we should end up looking like this:
Step 8
- Alright, now we're getting to where the rubber meets the road. Cutting this picture out can be done in a variety of ways. Use the color black with a pencil and brush and draw on our "original" layer with the mask as close to the picture as you can get without drawing on the penguin's body or the pictures white frame. Normally we could use the magic want tool for this step if the color separation was better p- or inverse color selection for those that really know your Photoshop tricks, but this little guy has some sutbborn color separation, so we're just going to use this method. Again, get it as close to him and the frame as possible without drawing over them.
- Click anywhere in the black and choose the "cut" option again and it should leave us with the photo above. You may need to use the "rasterize layer" step from above if Photoshop gives you a completely white screen.
Step 9
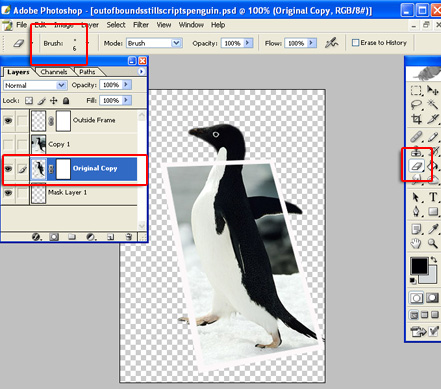
Now we're going to need to clean this photo up. Choose your eraser tool (set on "brush as shown in the photo below) and clean up the outsides of the photo by erasing the "Original" layer near and underneath the photo frame (your frame layer will stay in tact) and around the exterior parts of our penguin. This is where the steady hand and patience comes on.
Step 10
Now we're going to get his body parts outside the photo. With the "Frame" layer slected - set the opacity so that you can see the penguin underneath (as shown in the photo below).
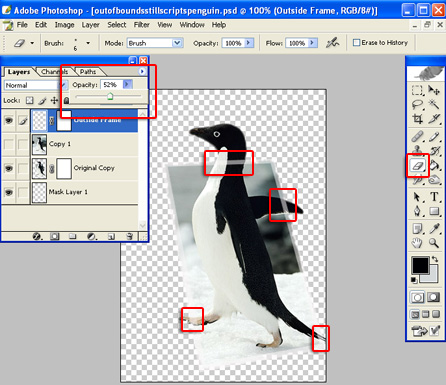
All the areas marked in red are areas we're going to want to use the eraser tool to erase where his body parts are. Be sure you use a steady hand here too, and only erase enough to let his body prts from the lower layer shine through, but still keeping the frame edged right up against his body.
Step 11
Almost done! Now that w'eve got him ouside the photo we just need to put some finishing touches on him.
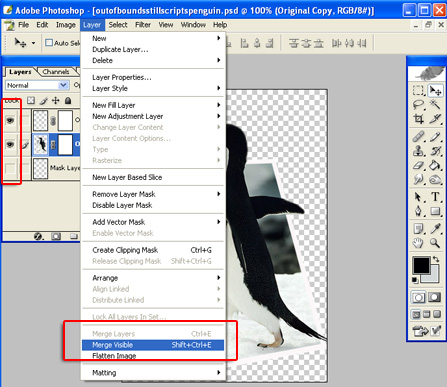
By this point we should only have three layers, "Frame", "Orignal" and one transparent Mask layer. Delete any extras we may have had before this step. Now, with the two layers "Frame" and "original" slected as visible (cvlicing the boxes where highlighted in the photo above to make sure only those two have the "eye" symbol) we're going to choose "Layers" and then "merge visible" to merge the two together while keeping our transparent layer separated.
Step 12
The final step! Now all we ned to do is select our layer with the framed penguin and add some drop shadow. Go to "Layers", then "Layer Style" then "Drop Shadow". Adjust the direction of the shadow (I use top right) and levels (I usually use 1 distance and 2 spread) to give us the somewhat 3D look for our photo against the transparent background.
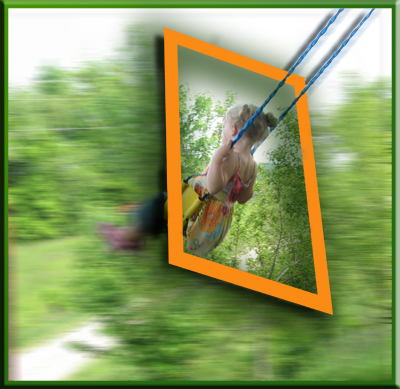
Save him as a .png and enjoy! You've just released something from its photo into the wild. I hope this tutorial was easy to follow and enhoyable.
Second Version of same Tutorial
- Choose a picture.
- Isolate the target. You may use the lasso tool, or the extraction filter.
- Put the target in its own layer. Right click in the middle and choose layer via copy. You can use layer via cut, but it will leave a hole in the background and could be troublesome later during during touchup work.
- Add a layer at the bottom and fill it with color. Gray is a good choice, but so is black or white or any other color you like. When you are done you should have a layer menu box that looks like the one below (add photo). The bottom layer is your solid color; the next layer is your original image, and the top most layer is the target.
- Now distort the original image. Highlight that layer in the layer menu bax. Then go to the Edit menu, select Transform, and choose Distort. Perspective works too, but Distort gives more options. This will put small boxes around your photo. Grab those boxes on one side and pull them in to shrink that side of theimage and grap the opposing boxes and pull them in or out until you get a good result that your are happy with.
- It should end up looking something like this:
- photo here
- Now for the touch up. If you created a layer via cut, you will see a hold in the slanted original photo that needs to be fixed. i fyou used layer via copy you will see part of the target that needs to be covered up or erased. so with the clone tool, healing brush, eraser, tec., fix tht part of the original image to make it look as natural as plossible. You could always use an entirely different background image than the one the garget came from. It will take practice before you achieve a good result so just keep at it. You can add a frame now if you wanted or add the frame right prior to distroting the background image.